
If you are data analyst or data scientist working with python, then probably you are already familiar with pandas, but if you are entering a spatial domain data analytics you should check out GeoPandas. It extends panda’s capabilities by adding spatial operations and geometric types. In this blog I will focus on two aspects of GeoPandas: visualization and simple spatial analytics.
Let’s start from notebook output area setup, so that we can see the entire map, without vertical scrollbars.
%%javascript
IPython.OutputArea.prototype._should_scroll = function(lines) {
return false;
}
import geopandas as gpd
import matplotlib.pyplot as plt
import warnings
warnings.filterwarnings('ignore')
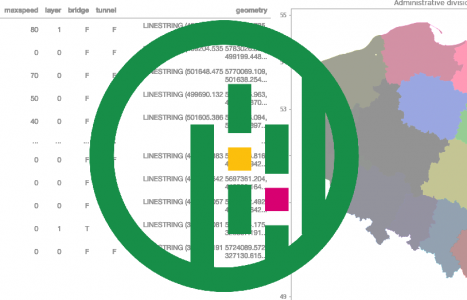
Data used in this post is open source and comes from envirosolutions web page. Similar to pandas, geopandas allows you to easily read and write from spatial formats like: Shapefile, GeoJson, postgis. It is mostly achieved thanks to Fiona which is used here, similarly like Shapely (used for geometry format storage and spatial data analytics) or matplotlib (used for data visualization).
#https://www.envirosolutions.pl/otwarte-dane.html
gdf_admin=gpd.read_file('admins/admin_gen.shp')
gdf_roads_main=gpd.read_file('roads/roads_main_gen.shp')
gdf_rivers_main=gpd.read_file('rivers/rivers_main_gen.shp')
First method for geometry display is using matplotlib.pyplot, which was already disscused in this post : Matplotlib: Lines, bars, pie charts and some other stuff
fig, ax = plt.subplots(1, 1,figsize=(10,20))
plt.title('Administrative division of Poland')
gdf_admin.plot(column='JPT_NAZWA_',
ax=ax,
legend=True,
cmap='tab20',
legend_kwds={'bbox_to_anchor':(1.3,1),
'title': 'Woiwodschaps',
'title_fontsize':12,
'frameon': False}
);

Other option for geometry display is interactive map based on folium/leaflet.js, here you can easily display your geometry with underlying layer (i.e map or aerial imagery)
m=gdf_admin.explore(column='JPT_NAZWA_',tooltip=False)
m
gdf_roads_main[gdf_roads_main.fclass=='motorway'].explore(m=m)
Now let’s try to do something with our data. First task will be to calculate road length coverage per admin in Poland (stats will be calculated only for the main roads). Our original data reference system is WGS84, and as we want to get stats in meters, let’s project our data to UTM. Geopandas might help you there and estimate what is the applicable UTM zone for your data.
gdf_admin.crs
<Geographic 2D CRS: EPSG:4326> Name: WGS 84 Axis Info [ellipsoidal]: - Lat[north]: Geodetic latitude (degree) - Lon[east]: Geodetic longitude (degree) Area of Use: - name: World. - bounds: (-180.0, -90.0, 180.0, 90.0) Datum: World Geodetic System 1984 ensemble - Ellipsoid: WGS 84 - Prime Meridian: Greenwich
gdf_admin.estimate_utm_crs(datum_name='WGS 84')
<Projected CRS: EPSG:32634> Name: WGS 84 / UTM zone 34N Axis Info [cartesian]: - E[east]: Easting (metre) - N[north]: Northing (metre) Area of Use: - name: Between 18°E and 24°E, northern hemisphere between equator and 84°N, onshore and offshore. Albania. Belarus. Bosnia and Herzegovina. Bulgaria. Central African Republic. Chad. Croatia. Democratic Republic of the Congo (Zaire). Estonia. Finland. Greece. Hungary. Italy. Kosovo. Latvia. Libya. Lithuania. Montenegro. North Macedonia. Norway, including Svalbard and Bjornoys. Poland. Romania. Russian Federation. Serbia. Slovakia. Sudan. Sweden. Ukraine. - bounds: (18.0, 0.0, 24.0, 84.0) Coordinate Operation: - name: UTM zone 34N - method: Transverse Mercator Datum: World Geodetic System 1984 ensemble - Ellipsoid: WGS 84 - Prime Meridian: Greenwich
gdf_admin = gdf_admin.to_crs(32634)
gdf_roads_main = gdf_roads_main.to_crs(32634)
gdf_rivers_main = gdf_rivers_main.to_crs(32634)
gdf_admin.crs.name
'WGS 84 / UTM zone 34N'
Below is a simple function calculating our stats, let’s see step by step what is happening there:
- spatial join between road layer and admin layer
- calculating length in meters (and then we divide by 1000 to get kilometers)
- group by admin and sum length
def get_road_stats_per_admin(roads,admin):
roads_admins=roads.sjoin(admin, how='left')
roads_admins['length']=roads_admins.geometry.length/1000
return roads_admins.groupby('JPT_NAZWA_')['length'].sum()
get_road_stats_per_admin(gdf_roads_main,gdf_admin)
JPT_NAZWA_ dolnośląskie 4517.698455 kujawsko-pomorskie 3737.275930 lubelskie 3853.579712 lubuskie 2851.770112 mazowieckie 6743.371905 małopolskie 3211.618749 opolskie 2121.366627 podkarpackie 3228.039657 podlaskie 2728.736926 pomorskie 3627.990137 warmińsko-mazurskie 3314.643013 wielkopolskie 5597.587353 zachodniopomorskie 3675.951036 łódzkie 3574.281294 śląskie 3812.992296 świętokrzyskie 2069.404417 Name: length, dtype: float64
Second task is to create a new layer called bridge. We will find intersection between rivers and roads and at those point create a 20m long bridge overlaying with road geometry. In order to achieve this task, we create a function with following logic:
- dissolve road and river geometry to get just one multipart element per layer and then intersect those layers to get intersecting point
- For intersection points create GeoDataFrame with 10 m buffer
- Clip roads geometry with buffers to get bridge geometry overlying with roads
def get_bridges(roads, rivers):
bridge_loc=roads.unary_union.intersection(rivers.unary_union)
bridge_buff=gpd.GeoDataFrame(geometry=[p.buffer(10) for p in bridge_loc],crs=32634)
return roads.clip(mask=bridge_buff, keep_geom_type=False).to_crs(4326)
gdf_bridge=get_bridges(gdf_roads_main, gdf_rivers_main)
gdf_bridge.explore(style_kwds={"color":"red"})
Last step is to store our bridges GeoDataFrame to shapefile
gdf_bridge.to_file('bridges/bridges.shp')
That was just a small sample o GeoPandas capabilities. In a nutshell, instead of doing your spatial analytics in GIS tools, with using this powerful tool, you can embed your spatial related work at larger python project and automate your work.
You can download this code from my GitHub